Vendor Pre Press Configuration
Mac & Windows
What's this for?
This quick step guide explains the configuration steps required to prepare your computer for creating print content for Pearson.
It should be used by:
- External vendors (Mac or Win)
- Pearson staff with Windows computers.
Pearson Staff who use Mac and have access to Self Service should use this guide. If you do not have access to Self Service then please continue with the configuration steps below.
Install settings
Install Colour settings
- Launch Adobe Bridge
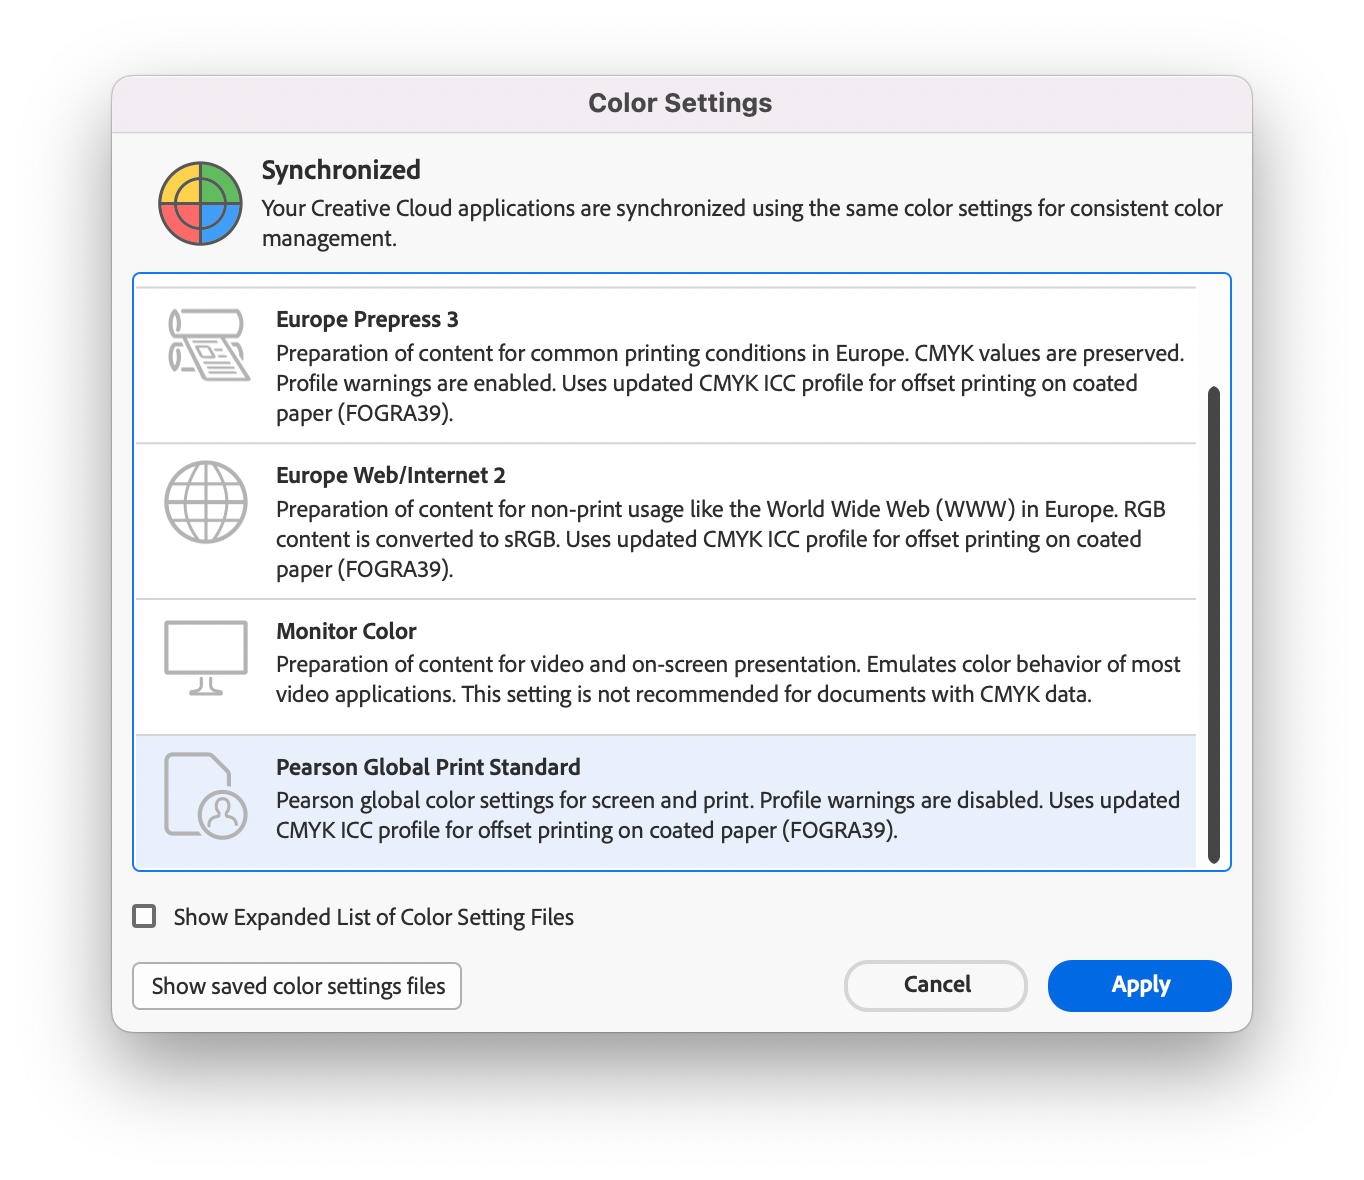
- Go to Edit > Colour Settings… and click Show Saved Color Settings Files. This will reveal the Settings folder.
- From the Pearson_PPS_config.zip file locate the Pearson Global Print Standard.csf and copy into the Settings folder.
- Back in Adobe Bridge, cancel the Color Settings window, and open it up again.
- Select the Pearson Global Print Standard from the list and click Apply .This will synchronise the colour settings across the Adobe CC apps.
Install InDesign PDF/X-1a export settings
- Launch Adobe InDesign - (Confirm colour settings have been correctly applied by checking Edit > Colour settings… )
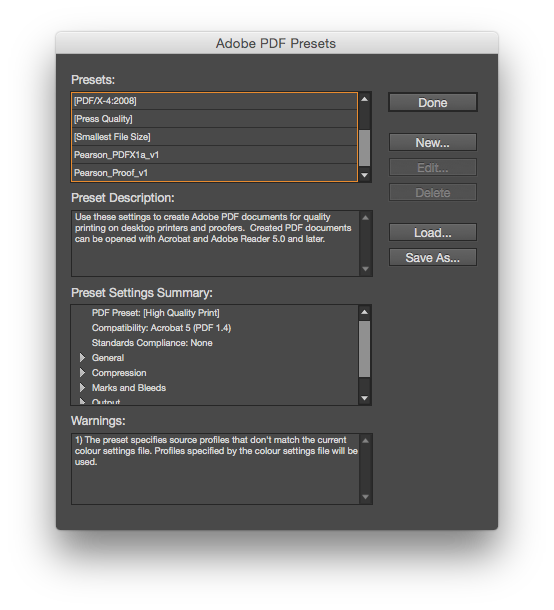
- Navigate to, File > Adobe PDF Presets > Define… and click Load… from the window.
- Locate the Pearson_PDFX1a_v1 profile (from the Pearson_PPS_config.zip file), and click Open.
- Repeat step 3 with the Pearson_Proof_v1 profile. Then click Done to exit the Adobe PDF Presets window.
Install Pearson Preflight profile
1. Launch Adobe Acrobat Pro
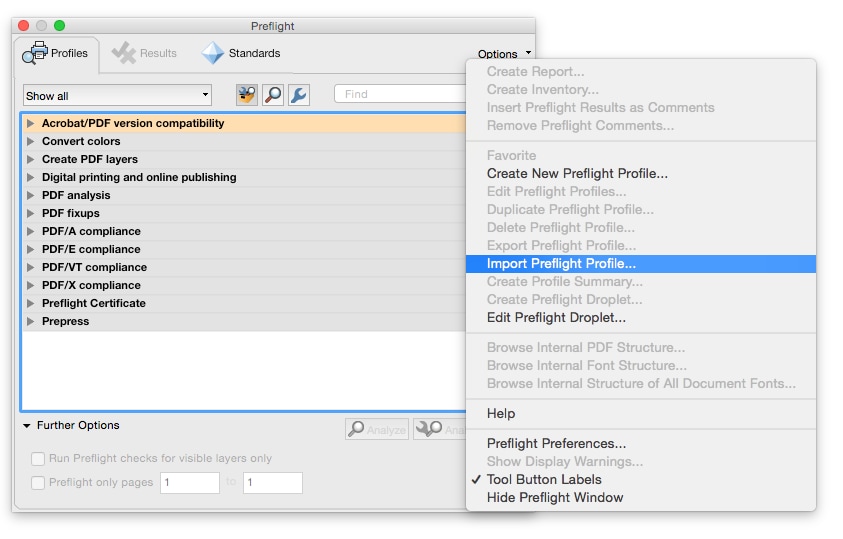
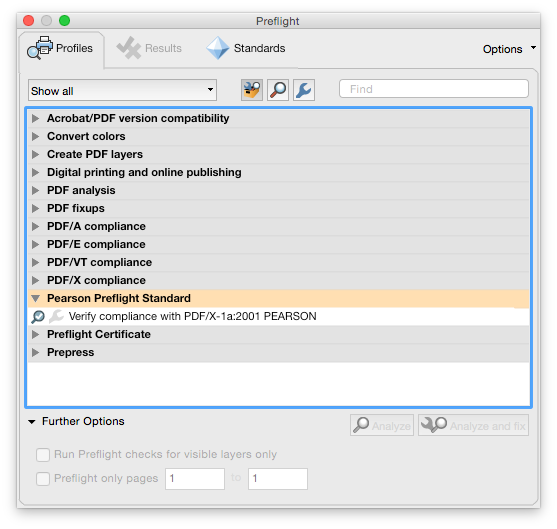
2. Navigate to Edit > Preflight… then from the Preflight window click Options (top right) and select Import Preflight Profile... from the dropdown.
3. Locate the Pearson_Preflight_Standard_v1.kfp (from the Pearson_PPS_config.zip file), and click Open.
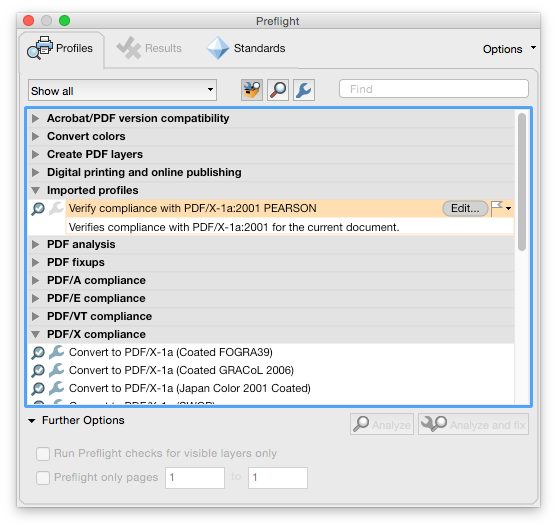
4. The profile is now installed but it’s recommended to rename the group. To do this, select the Pearson profile and click Edit.
5. From the Edit Profile window, select New Group... from the dropdown and enter
Pearson Preflight Standard as the group name. Click OK to both the open windows.
Folder Creator Tool
Using either Chrome or Firefox web browsers, enter the following url.
http://foldercreator.pearson.com
Pre Press Guidelines
Guidelines to accompany our Pre Press Standards can be accessed from here.


