Creating PDF/X-1a files
for Print with Adobe InDesign
Why PDF/X-1a?
The PDF/X-1a standard eliminates many of the common errors found when supplying files for press including missing fonts, incorrect colour space & missing images. A preflight check can be performed on any PDF to validate its conformance to the PDF/X-1a standard before submitting to manufacturing.We ask our pre press vendors to use the latest versions of Adobe InDesign along with Photoshop & Illustrator from the Adobe Creative Cloud suit to create our printed content. PDF/X-1a files can easily be created using our Export setting direct from InDesign.

Creating a PDF/X-1a file
Start with a solid foundation
Before jumping straight in you will need to ensure your computer and InDesign files are set up correctly.
- Pearson colour settings must be applied - see Colour Management Guidelines.
- Check page size and bleeds, 3mm symmetric bleed is the norm.
- Delete any unused items from the document e.g. pasteboard, layers, colours etc.
- Check font usage and ensure no missing fonts.
- Check image usage for missing and modified files, and update as necessary.
- Check your effective resolution for all placed raster / bitmap (image) files.
- Check all colours in the Colour palette and ensure that they are set to the required colour space. i.e. Ensure that the Spot Colour option is not left on for intended process colours.
- Check all keyline widths in text and artwork, no keylines should fall below 0.25pt (points) where possible.
- For Covers, be sure to include spine and fold marks within the Slug area.
- It is acceptable to use both RGB and CMYK colour spaces for assets/links placed within an InDesign document.
- Transparency Blend Space from InDesign's Edit menu must be set to Document CMYK
Creating a PDF/X-1a file for Press & Archive
Once your computer and Adobe applications are set up correctly, open an InDesign file and navigate to:
File > Adobe PDF Presets > Pearson_PDFX1a_v1... select your Save location, then click Export. The PDF/X-1a will save in the background to your chosen location.
Creating a Proof PDF
Essentially this is the same as the PDF/X-1a preset, but it produces a double page spread for WIP proofing purposes. This preset must not be used for final press output. Proof PDF's are not a requirement for archiving.
To create a Proof PDF, open an InDesign file and navigate to:
File > Adobe PDF Presets > Pearson_Proof_v1... select your Save location, then click Export. The Proof PDF will save in the background to your chosen location.
Validating PDF/X-1a files
Once you've created PDF/X-1a files for Press & Archive, we now require you to perform a couple of validation checks to confirm the files are made to standard.
Proof PDFs do not require validation.
Check for conformance
First, you'll need to validate your PDF/X-1a has been made to PDF/X-1a standards.
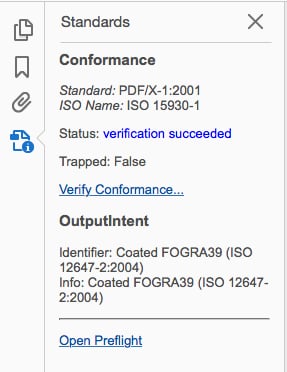
Open the PDF/X-1a in Acrobat Pro, click on the PDF conformance icon and run the Verify Conformance... option.
Note - you can also open the Preflight panel
from here.
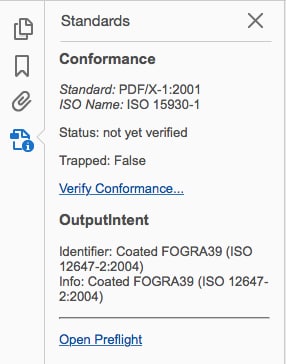
A verification succeeded message will identify a pass.
If you do receive a verification failed message, please check your configuration and remake the PDF/X-1a
Preflight
Following a successful conformance check, you're now required to run the Pearson Preflight Standard.
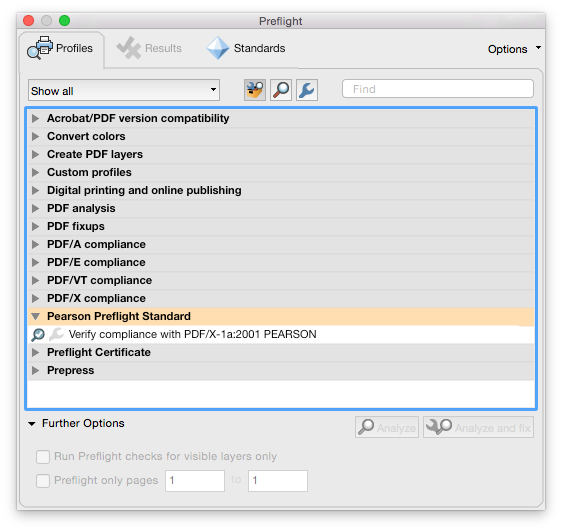
Open the Preflight panel from the Edit menu, select the Pearson profile and click Anyalyze
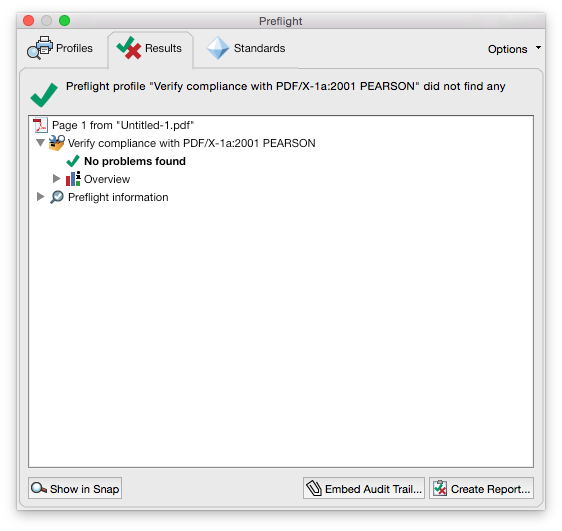
The Preflight results will appear.
A successful report will display a green tick with No problems found.
Click the Create Report button.
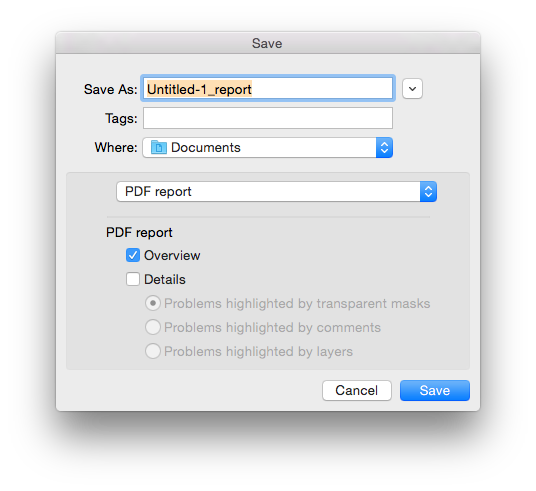
Now save as a PDF report, to the correct location in the Folder Structure.
Important - Ensure the Details check box is unticked. This will produce a single page report.
Troubleshooting
Okay, something's not gone as expected. Below you'll find answers to some common questions and issues.
If none of these fit your query, you can contact the Asset Management team
Preflight warning
The preflight report shows a yellow warning triangle, and lists either or both of the following:
- Line thickness bellow 0.25pt
- Image resolution below 225ppi.
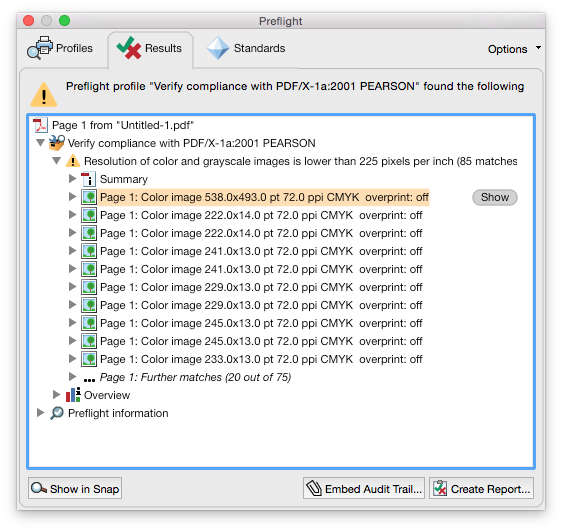
This is merely a warning to the content creator that images or artwork have fallen outside of our preferred print specification.
Check each item in the list, ensuring high re images have been placed where available. It may be that a Screenshot has been placed and this is the only file available.
Click the Show button to view the selected image.
If you are happy with the image files, then the PDF/X-1a can be included for Press & Archive.
Preflight failure
The Preflight report shows multiple red crosses!
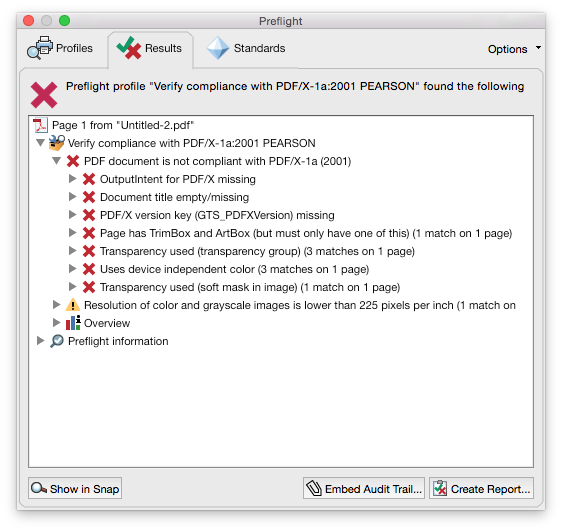
This is not a PDF/X-1a file. We will not accept PDFs like this for Press or Archive.
Check your computer & InDesign settings (see the 'Start with a solid foundation' section above) and remake the PDF/X-1a using the Pearson_PDFX1a_v1.. preset.
Requires access to Self Service
Mac & Win for both Pearson and external vendors

